Tuesday, January 15, 2013
2013 New Announcement
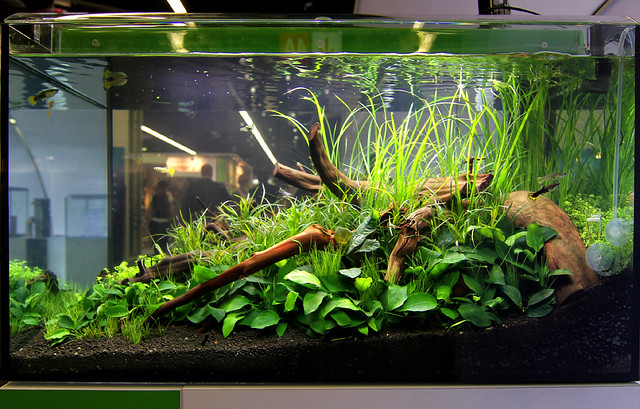
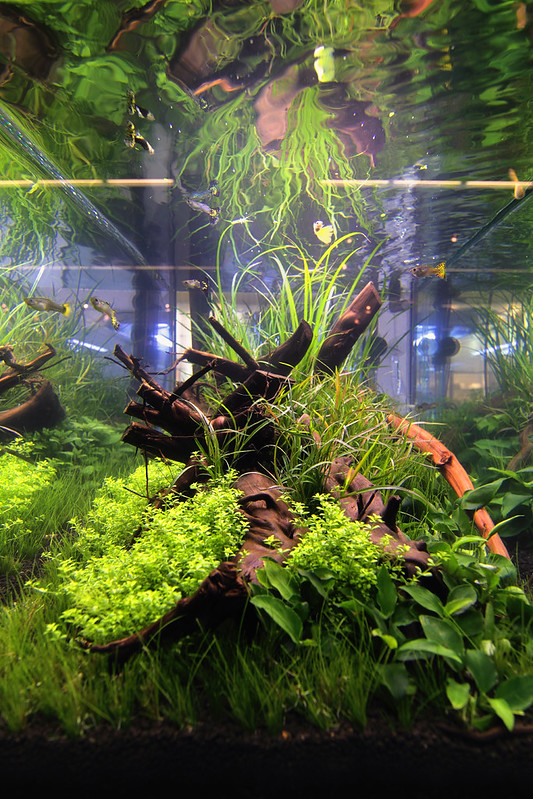
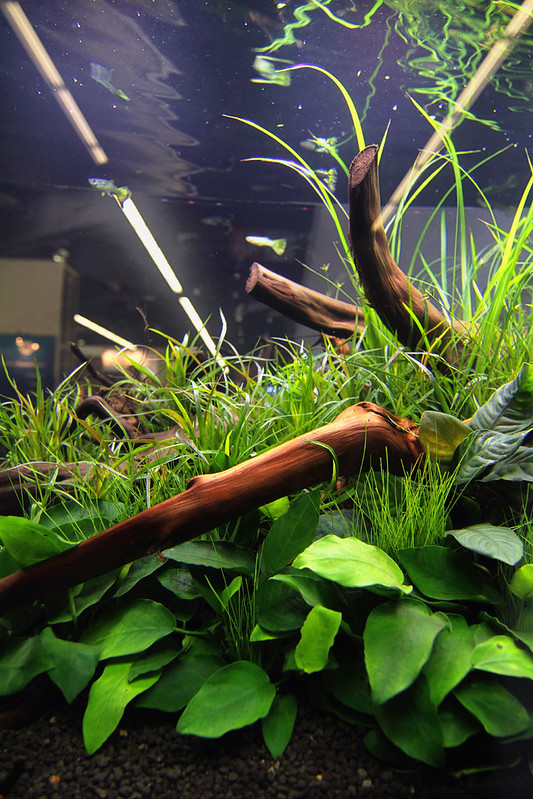
Use your imagination ' Update 2013
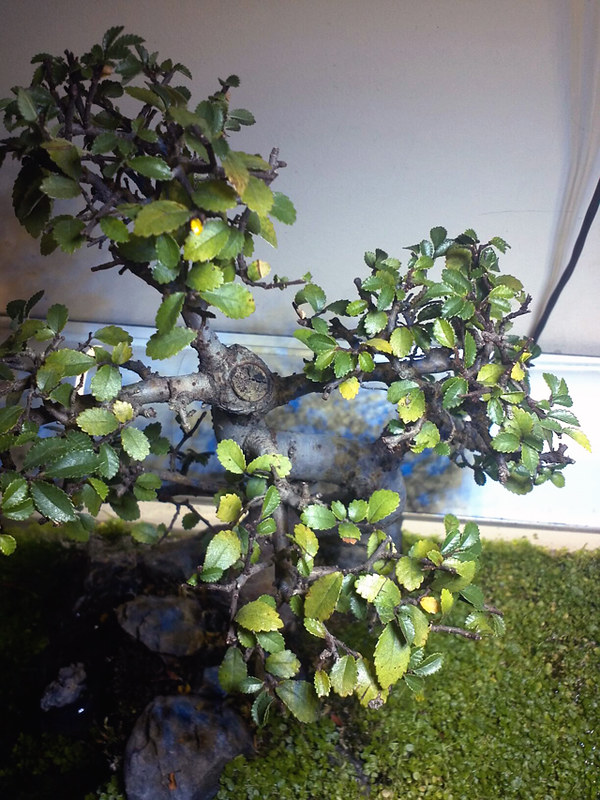


After few days:
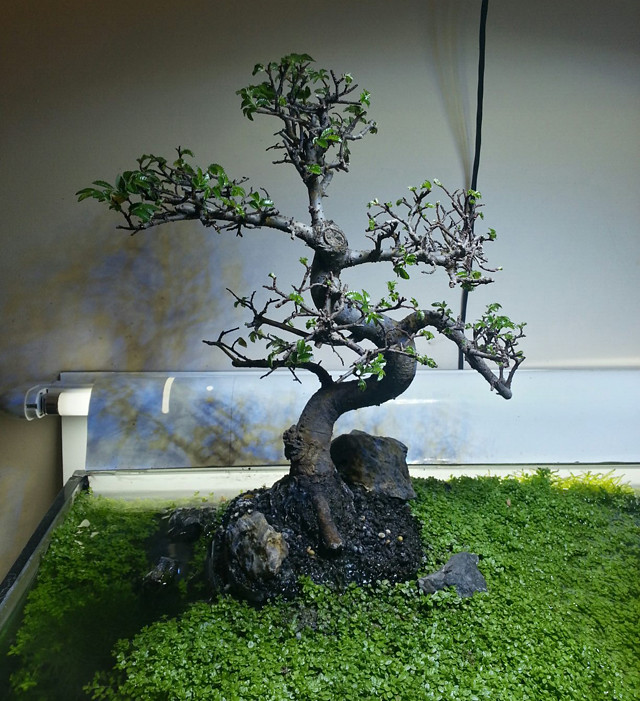
After 2 weeks:
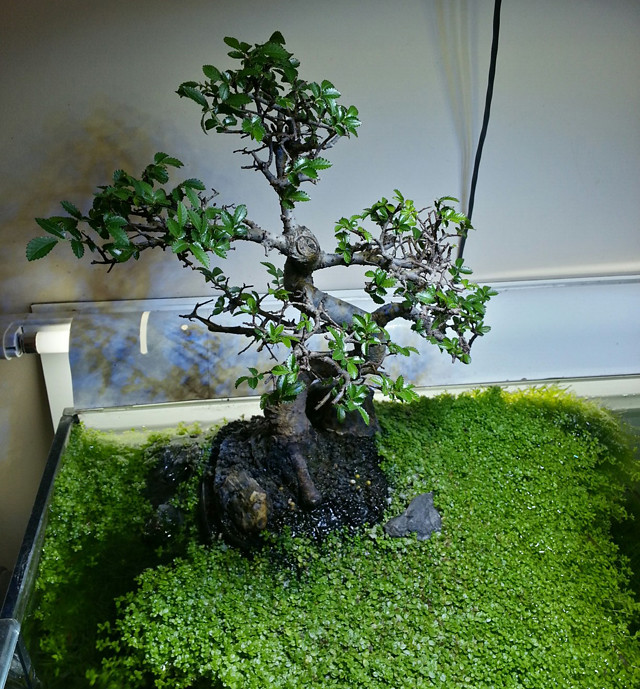
At the moment, the project still going and I have made a short video just to show how it looks like right now:
New video coming soon!
Wednesday, May 23, 2012
Elos Aquastudio Neoquarium in Nice
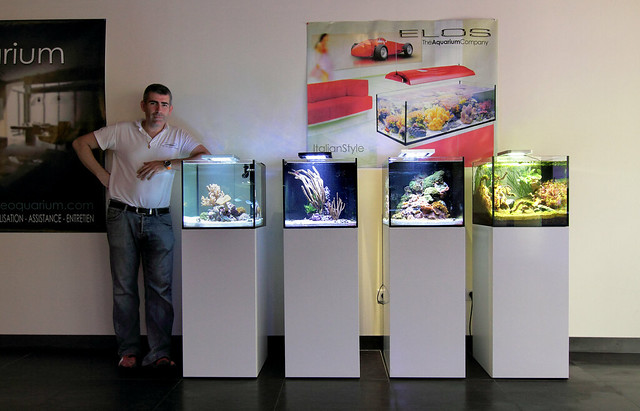
Entrance of the Aquastudio, marine and (now) some planted aquariums! :-)
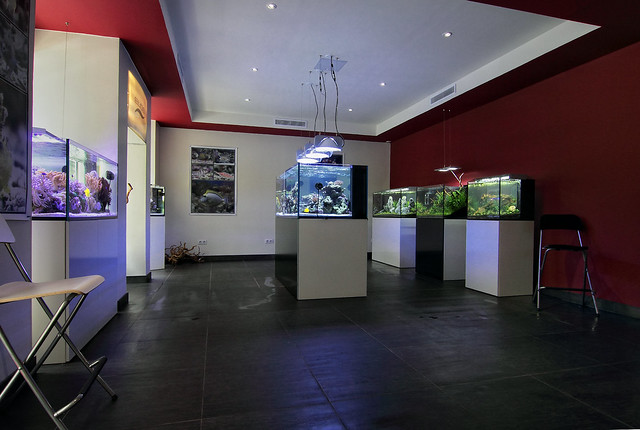
Virtual visit to Neoquarium:
Time Lapse of how to setup a planted aquarium:
More and more news coming out very soon! I hope that you enjoy it ;-)
Layout of New Elos Concept80 on Interzoo 2012
This is the view that was visible from the inside of ELOS booth.

View from outside of the booth
Just an interesting detail of the layout.
Tuesday, May 08, 2012
New ElosConcept80 ' full customizable
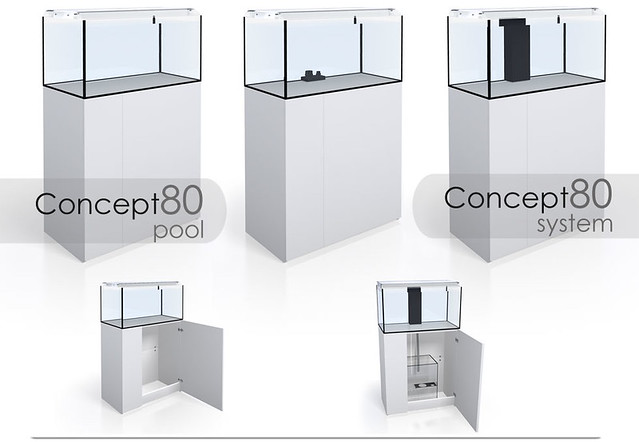
Choose it in white, black, and silver or indulge with the more refreshing green and red. And if you want to make a "statement" you can even connect it to the E-Vision to fully control your light by the touch of a finger.


Friday, November 25, 2011
Elos Europe Blog: Products included in Xmas Promotion ' FreshWater Aquariums...
Saturday, November 05, 2011
Elos Europe Blog: Christmas Promo

Wednesday, November 02, 2011
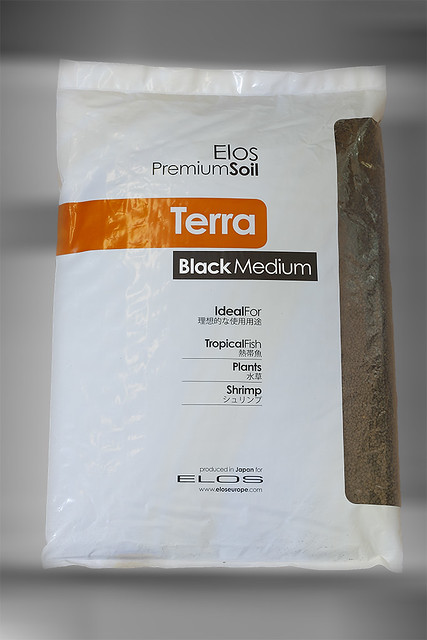
ELOS BlackMediumSoil
With ELOS Terra brown soil usually I use some newspaper to cover the soil and plants to avoid getting cloudy water after fill the aquarium with water. In this case and to show you how different it is, I filled up the aquarium directly from TAP water without newspaper and any kind of filtration during the process... You must see to believe!!! Take 7min of your time and watch it ;-)
Monday, October 31, 2011
60L NewLayout Step by Step
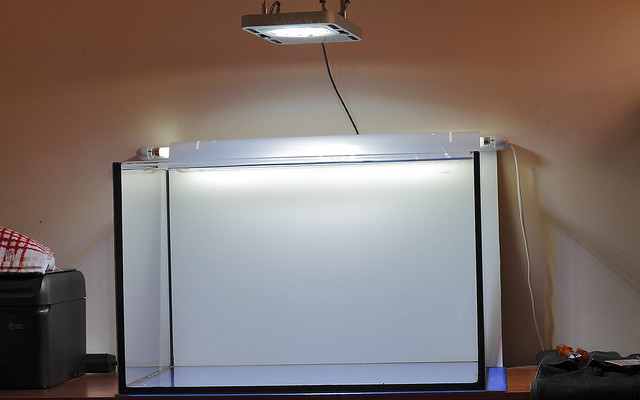
After passing some hours catching all the shrimps, fishes, plants and removed the soil, the aquarium is now empty and cleaned to receive the new layout.
In this setup, I used a different soil from ELOS, the New Medium Black Soil. I had used it before in Telford (AQUA2011) when I setup the ELOS Paludarium; What a great soil!!!
As you know I'm a big fan of the brown soil (ELOS Terra) because of its own properties that leaves the water crystal clear after a few hours even that you use a small filter. About this new soil, I will not say nothing about it... I prefer to show it in a video that I did when I filled the aquarium with water!
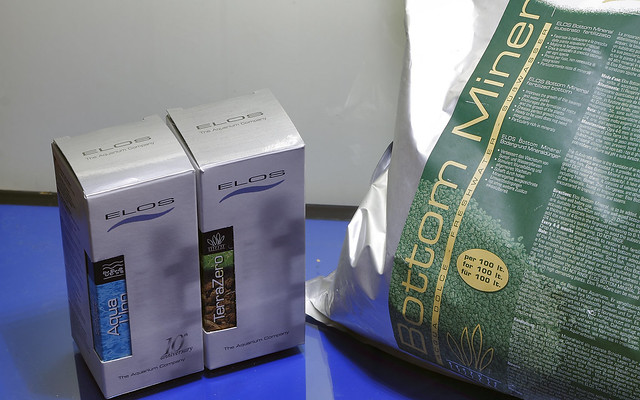
Products used on this setup, all of them from ELOS: New BlackMediumSoil, Bottom Mineral, AquaUno and TerraZero.
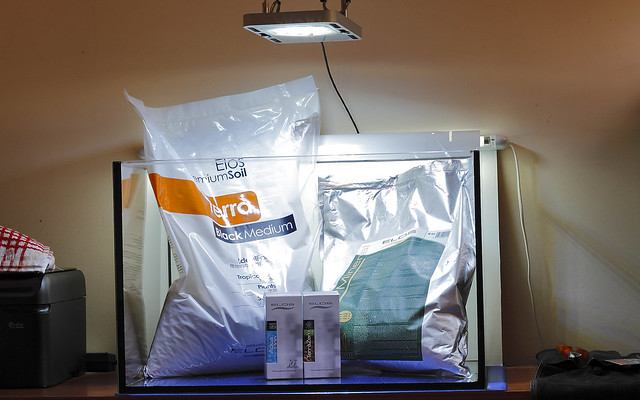
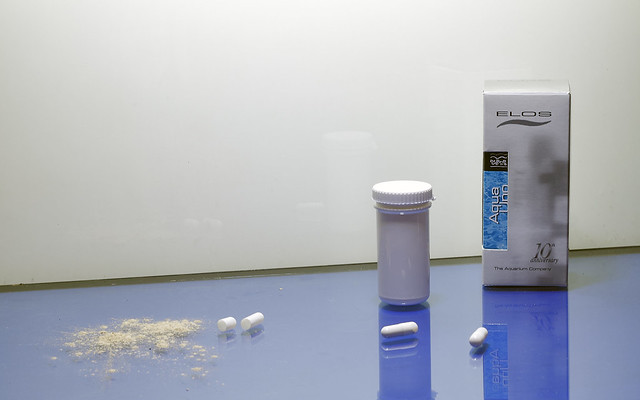
Picture of AquaUno (Special bacteria/Enzymatic Complex for Freshwater), TerraZero (powder rich in elements for long keeping planted Aquariums) and Bottom Mineral (mineral soil very rich in nutrients)
New MediumBlackSoil from ELOS:
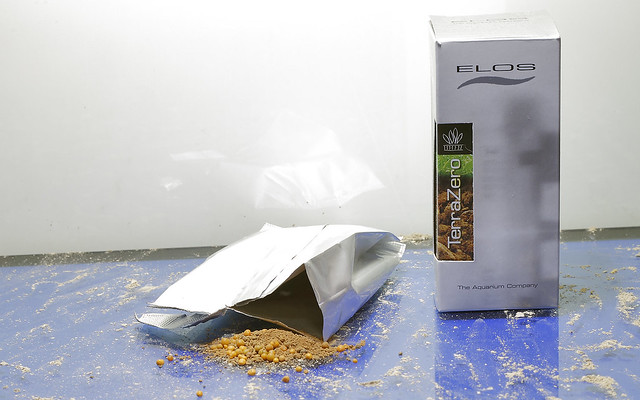
TerraZero, is a powder with elements that permits to keep a planted aquarium for longer without no need to increase the liquid fertilization. This will provide constant feeding to the roots of the plants for more than 18months when used together with Bottom Mineral.
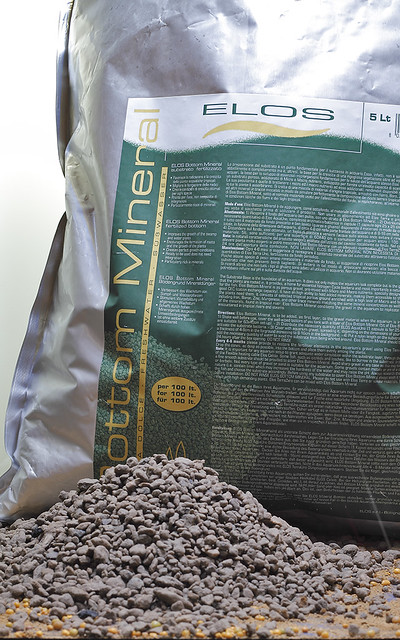
Bottom Mineral, plants need rich soil to develop their roots and grow healthy. Normal soils have nutrients that keeps them fed by a short period of time, of course depending on the quantity of plants used, but normally at least 3~4 months. When used a powerfull rich soil below the based soil, it will permits constant feeding for 12months without need of extra dose of liquid fertilization.
When I was in UK to Aqua2011 @Telford, I saw some beautiful pieces of hardscape and after a chat with the owner of UNIPAC, he kindly sent me a parcel with some fake rocks to use on my layouts. It is not common to find something like that in Portugal, or in other words, I never saw it on Aquarium's market... maybe because it's a new product or shop's owner don't believe that could be a good bet! To be honest, it was love at first sight and for sure a very useful product on my workshops, seminars and home setups. Its very light and you can carry on to everywhere; they have a lot of details and if I hadn't said so, people wouldn't beleived that was fake! Major value on this pieces of hardscape is that don't change your water's parameters, so you can simply use them in any kind of aquarium vs fishes!
In this setup I used Replica Decorative Products from UNIPAC ' The Suteshi Fake stones SR/C, SR/F and SR/I.
Before placed them on the soil, I added AquaUno (3 capsules) in bottom glass spreading them on entire bottom, later TerraZero (1 package in the same way as AquaUno), Bottom Mineral (1 bag) and finally covered very well the entire bottom with BlackMediumSoil to avoid the nutrients of the products used below stay in contact with the water.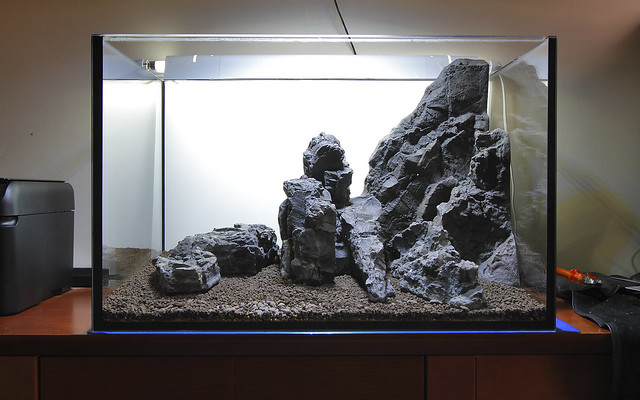
After placed the hardscape on the right position, I used more soil to fill empty zones between the rocks and give more depth to layout.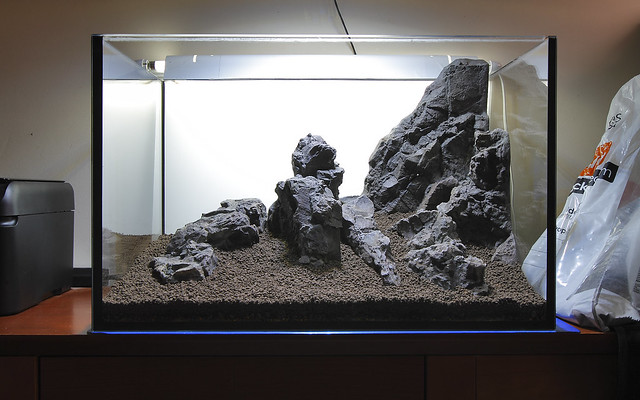
All the plants used are from Aquaflora.nl. They came well conditioned in packages of 5 pots each in a plastic box (pots of 5cm) and with great quality!!
Here it is a picture of the layout almost planted.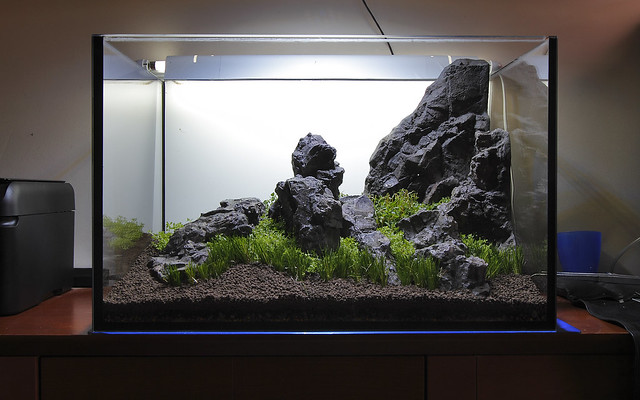
Before add the fishes and after fill the aquarium with water, I used 2 capsules of AquaUno directly on the water to provide some bacteria. After 15min, I added the fishes and invertebrates.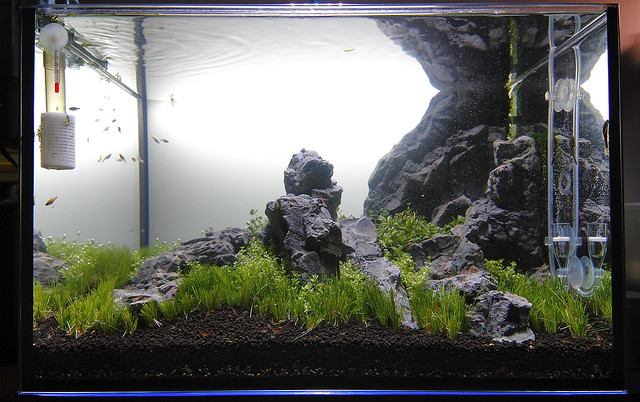
I hope that you enjoy it and news coming soon!
Thursday, October 27, 2011
Cleaning and how to prepare the aquarium for New Layout
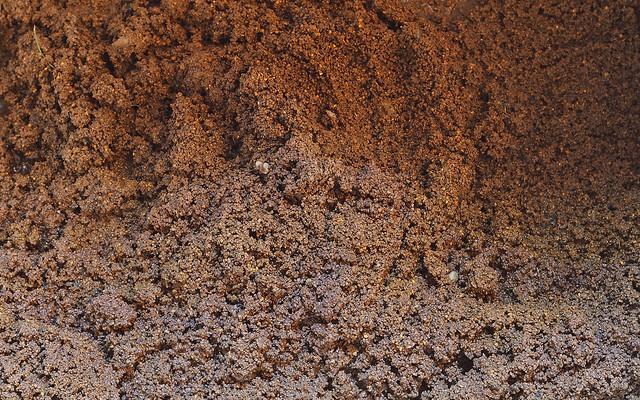
To be sure that is not a kind of mud, I've used a sheet of paper and it is visible the individual grains of the soil... so, no mud, just very wet!
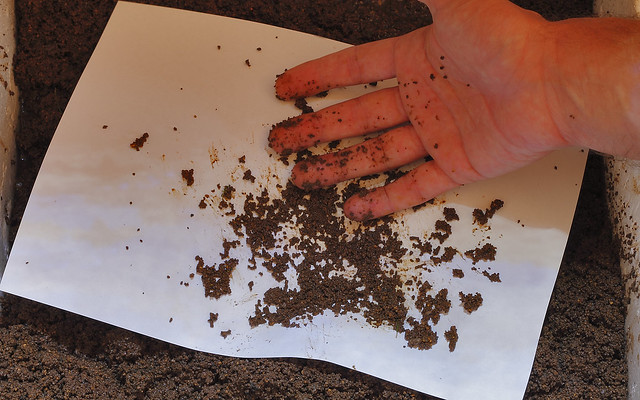
I have used my son shovel to play around on the beach to remove the soil and I must say that is very useful and pratical! With that, it was possible to separate the normal soil from rich soil (ELOS Bottom mineral), of course that in one moment they were mixed, but I will use it later as rich bottom and all the normal soil to cover it ;-)
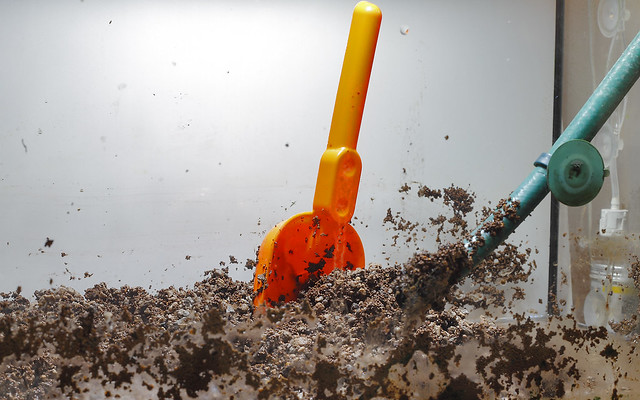
General view of all mess that I did on that moment...
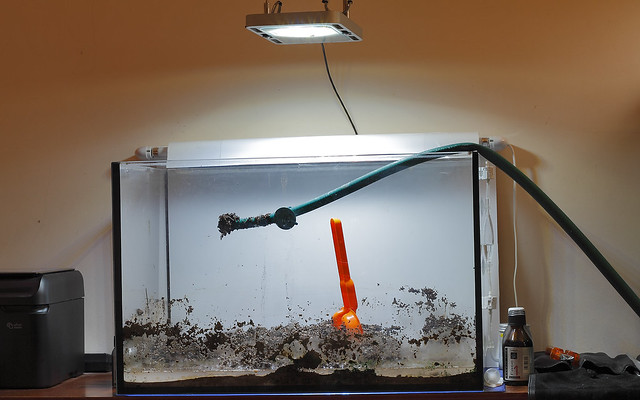
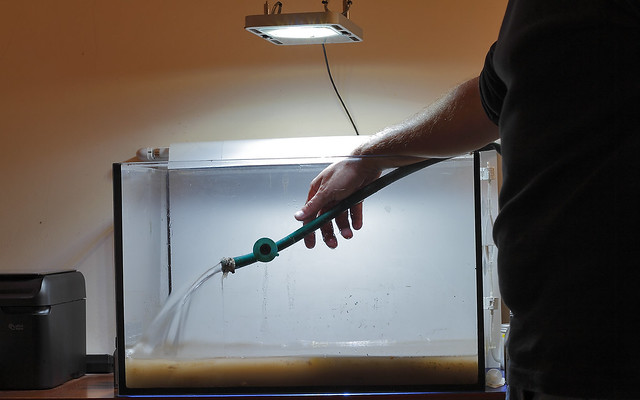
After remove all the soil and very carefully to avoid any kind of scratches on glass, it is time to fill the aquarium with water. This will help to "unglue" and clean all the soil that was on the glass. Now just need to do the opposite situation, with the hose, remove all the water and the soil that was on the glass and it is now on the bottom of the tank. Do it 1, 2, 3 times until is clean!
Saturday, October 08, 2011
Video of ELOS Paludarium ' MiniForest of AQUA2011
ELOS AquaForest Paludarium
by Filipe Oliveira
AQUA2011@Telford UK
www.elos.eu
pr@elos.eu
Can be seen in:
H2O Aquatics
13-15 Ongar Road Brentwood
Essex CM15 9AU
T:0845 4905052
E:Jon@h2oaquatics.co.uk
W: www.h20aquatics.co.uk
More pictures and videos coming soon.
Friday, September 16, 2011
Elos Europe Blog: How to install E-Lite lighting system
Elos Europe Blog: Elos temporarily suspend the sale of Terra SMALL
Monday, August 22, 2011
Calcium Reactor Elos REA 120 Plus – the complete review
After writing in the last month of two calcium reactors Korallin C-1501 and C-3001, I am going to review another calcium reactor, the Elos REA120 Plus. With this reactor, I have replaced the previous largest Korallin and I used it on my 400 liter tank filled with hard corals, and I’ve tried using both arm and natural CaCO3 media.

The photo shows the REA120 Plus just busted by the usual Elos pack, shown on the right. As usual the Elos packaging is fully accurate. The reactor is large and it is beautiful to see thanks to construction made of plexiglass and the many pieces turned from a solid, although it is obvious that to many aquarists the construction materials and care often are only marginally relevant.
Technically, the reactor operates with a single pump, a generous Eheim 1260, which deals with both taking tank water and recirculating inside, thanks to the generous flow values and head (2,400 liters / hour, 3.7 meters ).
 Inside the packaging there is the calcium reactor, the pump, a small booklet of use, a glass bubble counter, a special plastic check valve completely dismantled, and all necessary silicone connections for the efficient reactor operation.
Caratteristiche tecniche:
|
| Elos REA 120 Plus |
| Reactor height | 620 mm |
| External pipe diameter | 125 mm |
| Internal pipe diameter | 90 mm |
| Pump | Eheim 1260 |
| Height free to fill | ~ 42 cm |
| Capacity | 2,7 litri |
| Street Price (Italy Store) | 865 euro |
The reactor was used, like the Koralline C-3001, for my tank which (you can see one picture) and was able to maintain a stable calcium level between 400 and 450 ppm for several months.

Constructively Elos REA 120 Plus has a hole for one probe over its top for being controlled by controller, and the upper cap can be easily unscrewed to allow us to manage the reactor filling material.
Inside, there are sponges that prevent fill material must to be in contact with the pump.
The structure of the reactor is different from what we usually see, this is because the outer chamber serves as a recirculate circuit for water filled by CO2 to increase its final yield.
How it can be used
The reactor can operate in two different ways depending on how you choose to connect the two pipes present, thanks to the double inner chamber which is fitted. The filling material is inserted into the inner chamber and if you choose the mode “in pressure”, the CO2 is fed into the outer chamber where it comes into contact with water and mixed with it through the powerful Eheim 1260. In the inner chamber, the filling material will therefore always be in contact with water very acidic, and dissolves slowly releasing calcium into the water.
Thanks to a dual chamber, the CO2 which has not been completely mixed will be taken up by the pump and injected back into the outer chamber of the reactor, working as a highly efficient system for recycling of CO2. In this way the yield of the reactor is up and you get the most from CO2 consumed. The importance of high pressure in the outer chamber leads to a perfect blend between CO2 and water, avoiding contact with the water free of CO2 aquarium, so all the CO2 is used for the dissolution of calcareous material.
Otherwise you can connect the reactor in an opposite way, by including water and CO2 into the inner chamber as a normal gravitational reactor, in this way, though the yield decreases, the reactor is more easily controlled in the case of aquariums not particularly full of hard corals, and that do not need a high yield.
Setting up
The reactor is fairly simple to assemble, although the possibility of connection in two different ways, in pressure and gravity, can confuse inexperienced aquarist. There are sponges for the bottom and the top of the reactor to prevent the filling material comes in contact with the pump, among which must obviously include the material of choice. Then you must connect the pump through the two silicone tubes supplied. At the head of this pump is a T-fitting is used to draw water from the aquarium, while the silicone tube connected directly to the upper body of the pump will push the water pressure inside the reactor.

As we have seen before you can connect the two tubes in one direction (the pump that pushes into the inner chamber – a gravity method) or another (pump that pushes the outer chamber – pressure method), then you need to connect the various superior silicone pipes in accordance with instructions. A tube will act as a bypass between the inner and outer chamber, a tube directly over the top will be used to put the water from reactor to sump, while the last tube will be connected with the CO2.

The quality of the plexiglass and the bonding is clearly exciting, it’s a pity to put such an object in the sump, only considering the construction materials used and the care used.
As seen in photos all the pipes are connected by simple pressure, there are no parts to be screwed if we exclude the center cap and the hole for the probe is also useful to make a degassing of the interior of the reactor in case if the need arises.
The reactor could also be mounted outside the sump, but from personal experience in this case I would tend to add a sump pump that pushes the water inside the reactor, or I’d use a deviation from the return pump, otherwise the large Eheim will tend to maintain recirculation in the reactor and will fail to suck water from the sump.
The upper cap is screwed to the main body from which it is sealed by a large O-ring, thus making it very easy operation of filling and refilling, for emptying is obviously still need to extract the reactor from sump and turn it over elsewhere. As there are no metal pieces then the reactor is perfectly safe in its placement within the sump.

Manual Setting
The adjustment of the reactor must be done manually by adjusting the number of bubbles of CO2 input through the pressure reduction valve balanced with drops in output from the reactor through a plastic tap.
I usually recommend starting with two bubbles of CO2 every second and a one drop per second as output. The management of CO2 will adjust the pH while management of the drops it will set the total balance. In order to properly calibrate the reactor will proceed to measure the values of Ca, Kh and Mg before entering the reactor itself, then we will proceed to assembly and setting as referred above, or in any other way, then you should wait at least a day before making the second measurement, one in a tank and one just outside the reactor, to see if the contents of Ca and Kh is sufficient.

At this point we compare the output values from the reactor in comparison with those in the tank. To get a good efficiency, the reactor should have dKh greater than 30 outgoing, so if the second measure of dKH is lesser we need to increase the bubbles of CO2 entering, without adjusting the drops in output. We will wait for a day and we will do measurement again. Once the dKh will be greater than 30 (but 35 or 40 is good), we will compare the value of Ca in the tank measured before mounting the reactor and after mounting it. If the value has dropped it we need boost output, if the value is identical it’s okay, if the value is increased too much you can slightly reduce the number of drops in output. At this point we have a little problem, because varying the outflow varies the percentage of CO2 dissolved in the reactor, as with the same amount of CO2 we will have greater or lesser amount of water. We need therefore adjust slightly bubbles of CO2 in agreement with the increase or decrease the flow. Don’t worry if your reactor will demand more CO2… with this reactor is quite normal.
We need also to consider that with time our corals will grow and will need more calcium and so you need to occasionally recalibrate the reactor, also gradually the media inside reactor will consume and so the efficiency of reactor will decrease, to avoiding this I advice you to keep the reactor full or at least 3/4 full and refill it often, also because it’s a very simple task.
To simplify the administration of calcium reactor it is possible to connect a pH probe, in order to handle the amount of CO2 into the reactor through a valve controlled by a pH meter. In this way the management is apparently simpler, but hides pitfalls. First of all you need to calibrate the pH probe very thick (about 1 time per month for best results and to replace it every 2 years) because they tend to loose their calibration, it is also necessary to include in our management one valve and one pH controller having both cost of purchase, management and time. I however have always used the two reactors manually for over two years without any problems. In any case it’s possibile also to simply put the probe inside the reactor to read the value, so you can see if the reactor is working well.
I have to say that this reactor eats a lot of CO2, maybe for pressure mode, and so it’s possible your CO2 can finish in a very small amount of time compared to other reactors on the market.

The Eheim 1260 pump included is characterized, as we anticipated, from a static head of 3.7 meters, a flow of 2,400 liters / hour and a consumption rating of 65 watts. That translates into an estimated annual consumption equal to 569 kWh and a cost of 142 euros per year (counting EUR 0.25 per kWh). Consumption in any case not indifferent.
The reactor was built, however, considering the use of Ca-Pur, Elos filling media, which requires a very strong mixture, being very pure calcium carbonate with high propensity to be compacted if not properly maintained in motion. That is why I tried to use a smaller pump than the 1260. The choice is obviously fallen on a Eheim 1250 characterized by a static head of 2 meters, a capacity of 1200 liters per hour and consumes 28 watts nominal. That translates into an estimated annual consumption of 245 kwh, and a cost of 61 euros per year (counting EUR 0.25 per kWh). Consumption in this case much more accessible. In truth I would also like to try it with a pump even smaller, but so far I have not had the chance.
This reactor does not have a preferred filling material, as the pump supplied can work with any type of equipment, among others with the ability to use a smaller pump in case of using natural CaCO3 or Arm, materials that not require excessive fluidity, as I am doing.
My use of this reactor has not revealed any problems whatsoever, never blocking, apart the possibility of a block of output due to the deposit of calcium carbonate, probably amplified by not using a pump which maintains the entrance of the reactor under pressure, in this case you must open the clamp and drain the water rich in calcium excess.
The only problem of this reactor is in fact the consumption of CO2 is very high at least in a tank filled with corals like mine.
Conclusion
I believe the calcium reactor Elos REA120 an excellent all-purpose reactor. Complete with all equipment possible, capable of operating in two different modes to suit any use, ready to use a pH probe and built extremely well.
There is one characteristic that can not leave indifferent, the price is high, there are ways of getting around, you can buy a reactor from similar services by spending less than half what is required by Elos, a feature which then poses a often insurmountable barrier to its purchase. If we want to talk about value for money, unfortunately we did not, the reactor is too expensive. So why buy it? Because it is done well, because it is objectively beautiful and because it works well, last but not least because it is an exclusive product, and as such may represent the desire for someone.
For my personal experience I think the REA120 Plus suitable for tanks of hard corals up to 500 liters and when used in tanks with mixed corals or only soft coral it can handle double the capacity without major problems, in fact, adapting well to the requested range, thanks to its possibility to management by pressure or by gravity as we have seen.
The article was published on Magazine Acquaportal in the month of November:
Friday, July 29, 2011
The NEW ElosEurope Website was announced!

Wednesday, June 22, 2011
Friday, June 10, 2011
E-vision: The Elos presentation

The first modules available will be ElosTempo, ElosDimmer and ElosPower and that will be followed shortly by ElosClima.
The first three modules are in fact already available in late June to early July, we see the main features in the presentation made by Elos:
The Elos E-Vision is a broad new aquarium controller line that has a simple foundation but which can be built up into a very sophisticated aquarium & home controller.
Built on a framework of standard home automation bus, the heart of the E-Vision system are the individual controllers which include the Tempo, Clima, Orp, pH, Conductivity etc.
Here you can watch the video already published when Nicola, the owner of Elos, is able to change the brightness of the LEDs on each channel in its LiteXPColor in Verona, from Singapore, noted the response speed of the system when he acts on the slide.
The Elos Evision ControlCenter is the most attractive piece of the System. It is a touchscreen to remotely control your units (Timer, Temperature, pH etc. etc.). Its sensitive, high quality resistive touchscreen has a high pixel density and very high contrast and brightness.
Its unibody case is not just a plastic box but it is made by solid piece of acrilyc, CNC machined and then polished to excellent effect. It can be easily be stick on the door of your aquarium or, thanks to the magnet inside, it can be sticked to any metal surface.
Although the ElosTempo have simple onboard programming capability, the remote ControlCenter allows for more sophisticated programming of each Evision module through an easily navigable graphical user interface.
Sold at an introductory price of 320 Euro to final customer, we are actually planning a soft launch beginning for the coming summer and more widespread availability in September.
Easy Timer for easy life.
Easy: this was the keyword when we have though about a new controller to take the place of the BIOTOPUS II

Easy: this was the main target. We all know how lazy we are when it is the time to read a manual. We would like things to work once connected, without the need to do nothing.
This is what have inspired us on the production of our new line of Controllers.
But we also wanted them to be "connectable". What does it means?
Basic: they have to work in a "stand alone" configuration, but they can also be connected one to each other in an easy way. And once "part of a network" they will share informations to improve their performances like, for example: once on the network you connect the Tempo and the Clima controllers, an over- temperature detected by the temperature controller (Clima), will shut off the lights connected to the timer (Tempo).
But this is not all: we wanted it to be easily programmable, so we have created a "sensual" touch screen to easily acces to "hidden" functionalities like dosing timer, separate light timers etc. etc..
The WEB server is on board: but we wanted also to have it controllable by computer, with a "cloud type" interface so we have included the possibility to add a Web Server interface with a GPRS modem and a TCP/IP port to make it accessible by any browser, from any computer.
Robust: we wanted it to be based on an "industrial" standard". We have housed each module inside a DIN- TYPE box that allow their installation inside industrial rack permitting their integration to the household electrical system.
And much much more to come...
In the meantime you can dowload the manual directly from here: ElosTempo Manual
Actually available:
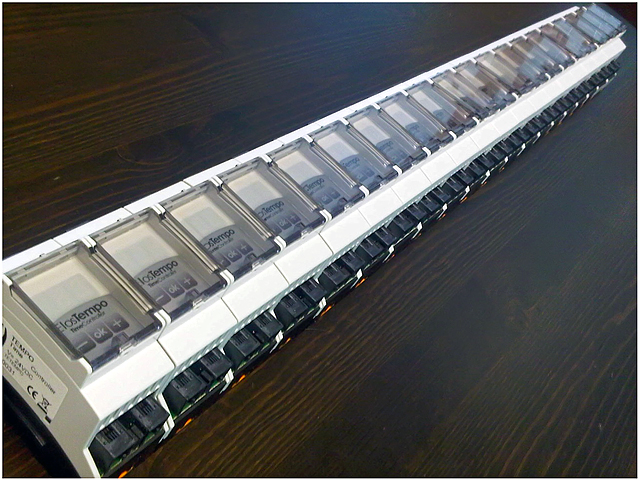
ElosTempo: DIN-Style Timer
Dimmer 3 pins: to control the Elos AquaTop
Dimmer 5 pins: to control the Elos E-liteXP and Elos E-liteXP Color
PowerBox: to control Metal Halide Lamp
You can download this presentation by clicking here: ElosNews
Returning then to us ... that mean? For many things I notice a certain similarity, certainly desired, between the Apple world and the Elos world, exclusive products, words such as unibody and more, it seems to me to go in the same direction ... Evision will be a success? We shall see, hoping soon to have a trial ... certainly it promises well for now, we just hope not to have to wait too long that all modules will be available.
DaniReef


